
How to Restore Clothing
Simple Repairs you can do!

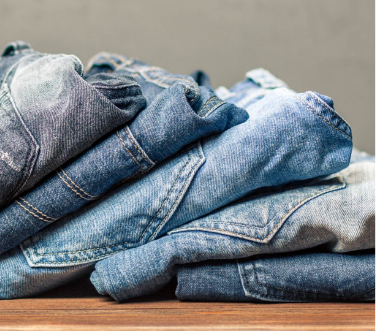
Ensure you’re getting the most for every piece of clothing you source, knowing how to make some of the simple repairs can go a long way to ensure you get the most for the article, but also saving the most by performing the repairs in-house as opposed to outsourcing.
While extensive repairs should be outsourced, the simple repairs can easily be done by anyone – even without any experience!
BUTTON REPAIRS: possibly the simplest of repairs is adding or updating buttons on a shirt or pants. Doing this can restore a garment for a quick resell. Provided you don’t have a matching button on hand, replace all the buttons on the shirt with new ones sourced from your local craft store. This will ensure all the buttons match and nothing will look out of place.
As a bonus, include a ‘replacement’ button when your item sells just in case they ever need to replace a missing button.
To sew on the button, follow these steps, or watch this video:
-
Thread your need and knot the end
-
Running the needle from the back end of the fabric, create an anchor point on the fabric where the button should go with an ‘x’
-
Place your button on top of the ‘x’ and run the needle again from the back end of the fabric, and pull the thread all the way through until you feel the thread knot snug against the fabric
-
Turn the needle and push it back down through the hole opposite the one you came through and repeat for a total of 6 passes
-
Repeat step 4 for the remaining two holes on the button or advance to step 6 if the button only has the one area to sew
-
On the last pass from the back of the fabric, do not go through the button, but rather take the needle out from under the button. With your needle, wrap the thread beneath the button – around 5-6 loops
-
Push the needle back into the base and tie off on the other side of the fabric
SEAM TEARS: clothing returns can exhibit a few tears after being tried on, bought, maybe worn, and then returned. For tears along the seam of a garment, these are easily repaired with a running stitch. Since this is moderately difficult, it’s best to see how it’s done a couple times before doing it yourself. Here’s a good video to watch for a great execution of the running stitch.
PATCHES: for tears or holes not along the seam, these can seem almost irreparable, but there are a few clever solutions to salvage the item. Since these may not be able to be sewn up, the next best solution is to patch. Rather than patching it with a similar color fabric or a plain white patch, enhance with a complimentary patch. For example, women’s jeans with tears can use lace as the patch. Using the running stitch seen in the video for seam tears, these patches can be applied in the same manner.
DRAWSTRING: sweats and hoodies often have a drawstring on the garment to tighten the hood or waistband. If this is missing from the article of clothing, it’s super easy to repair. Visit your local craft store to get the replacement cord and using a safety pin, attach the pin to one end of the cord. Thread the safety pin through the hole on the garment until it comes out on the other side.
Other common repairs like zippers and necklines can easily be fixed. Rather than dismiss the clothing piece as salvage, look at what repairs need to be made and see if you can do any of them yourself. Often times a simple wash, iron and minor repair is all it needs.
You might also be interested in:
How to Get a Shipping Quote
Price shipping & consolidate
Sourcing Locally
Tips & Tricks to Source from Store Closures